Fun Polka Dot Top with Added Flamingos
I will show you how I created this fun top which was just a left over from a dress in which I had used the bottom skirt portion and sleeves for another project. In this post I will show you how I added the flamingo sleeve edging to the armhole of the top.
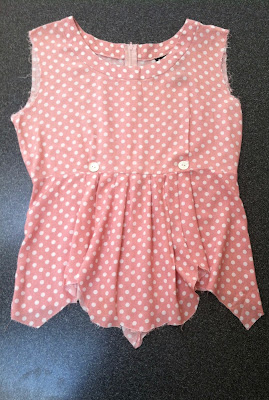
Original Left Over Fabric From Dress
Here is the original left over piece of material from previous dress. The sleeve openings need to be finished and the bottom portion needs to be trimmed to make a symmetrical look and then finished with a hem. The top is too short for my taste so I will attach a fun material by gathering it at the midline seam. First, let's start with finishing the sleeve openings.
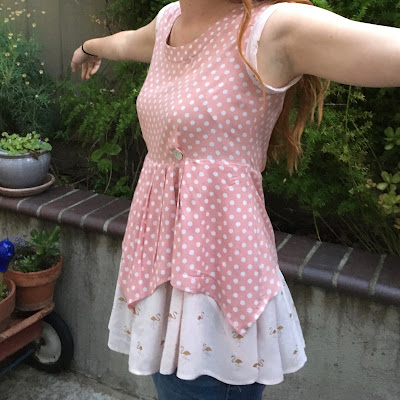
Here is the finished sleeve opening. I cut two strips of this fun fabric on a diagonal. I made it long enough to go around the entire armhole opening and wide enough to sew to armhole then fold over to the inside of garment to create a nice finish. See pics below for details on adding sleeve edge.
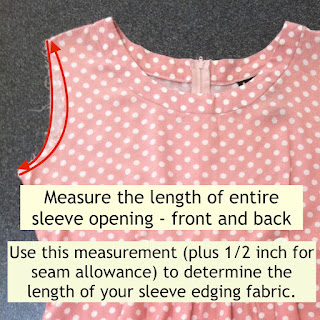
Measure for Sleeve Opening
Here we are measuring the entire length of the sleeve opening from front to back. We need to add 1/2 inch to this measurement to bring it together at the bottom of the sleeve opening or armhole.
Sleeve Opening Fabric Edging
Cut two (one for each armhole) diagonal strips 2 3/4 inches wide by the measurement of your sleeve opening, plus adding an additional 1/2 inch for seam allowance at the bottom of your sleeve. Cutting on the diagonal allows for a smooth edging that contours the opening better than fabric cut along the grain.
Cut out your edging fabric and we will be ready to pin and sew to our top.
First, reinforce sleeve opening by sewing a stay stitch all around the armhole or sleeve opening. This will help your opening not to stretch out. Next, with right-sides together, pin the cut fabric edging to the sleeve opening, starting at the bottom seam of the armhole opening. Fold up 1/4 inch seam allowance fabric at bottom of armhole as seen in above pic. Pin around entire sleeve opening but continue across armhole seam 1/4 inch at bottom, back where you started.
For your seam at the bottom of the armhole, make sure the start and finish 1/4 inch seam allowance edges meet up and align nicely. Turn right-side out to make sure it is lined up after pinning and then flip it back to sew. We will sew the fabric edging seam down once we have sewn around the entire armhole (pic below). You can also sew the start and finish 1/4 inch edgings with right-sides together before you sew around the armhole if you like. Either way will work.
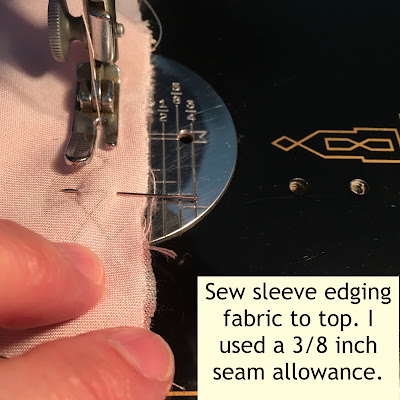
Sew Sleeve Edging Fabric to Top
Now we can sew the entire sleeve edging to the top. I used a 3/8 inch seam allowance as seen in picture. Remove pins one by one before you reach them while sewing.
Turn Right-side Out and Press with Iron
The sleeve edging is beginning to look very nice.
Fold and Turn Sleeve Edging to Inside
Turn
top inside out. Fold sleeve edging up at 1 inch from the front seam that you
just sewed. Tuck under another 3/8 inch for a nice finish. Pin in
place next to the seam you just sewed. Now we are ready to turn our top right-side out and sew.
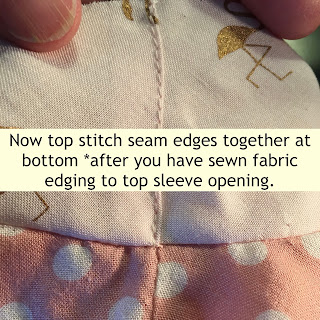
Top Stitch
Turn top right-side out and top stitch 1/8 inch from seam edge. Be sure to check that the inside of your edging is being secured as you sew. I remove each pin as I come to it before sewing over that area of fabric.
Finished Sleeve Edging
Here is the finished flamingo fabric sleeve edging nicely pressed. It's a fun way to finish off this top's armholes and incorporate the flamingo fabric to complement the ruffled skirt of the top so nicely.
Check out how I add the skirt to this top in my upcoming post: Fun Polka Dot Top with Flamingos - Adding the Skirt.
Finding the Fun Flamingos
It was so much fun to pick out the perfect fabric to complement the fun polka dots on this top. I took my salvaged top to Joann Fabrics to find something that would go well with this garment. This was another step in this project that was satisfying to do and accomplish - hunting for that perfect print.
What left over garment might you have that you want to be creative with?
Loving the process and enjoying the product,
Linda😊







No comments:
Post a Comment