 |
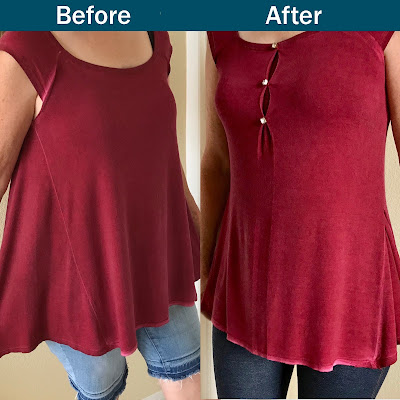
Adding an Inverted Pleat to a Top that's too Wide |
This top is too wide and flares out too far for my liking. I'm going to make this top less wide and a little more fitted by creating an inverted pleat down the center and partially taking in the sides.
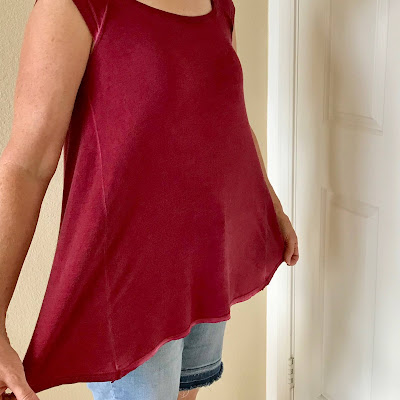 |
Way Too Wide |
Here is another view of the top. It's way too wide for my liking so I better get to work on making it fit better.
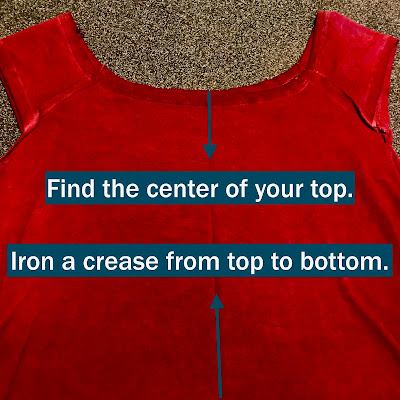 |
Finding the Center of the Top |
Find the center of your top. Do this by locating the center of both the top and bottom hem of your shirt. Measure from each side to find the center of the top, bottom and center sections of your shirt. Fold your shirt in half and then make a center crease from the top to the bottom by pressing it with an iron.
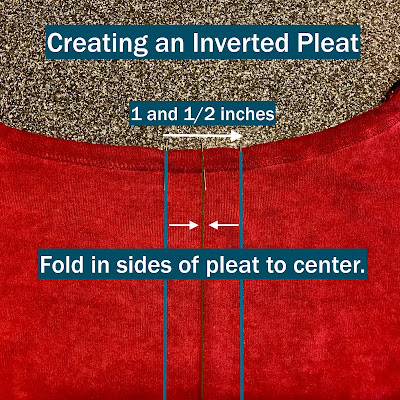 |
Creating an Inverted Pleat |
My pleat starts with a total width of 1 and 1/2 inches. Measure and mark your total width out of your desired measurement for your inverted pleat. Take the sides of your pleat measurements and fold those sides to the center of your shirt's crease.
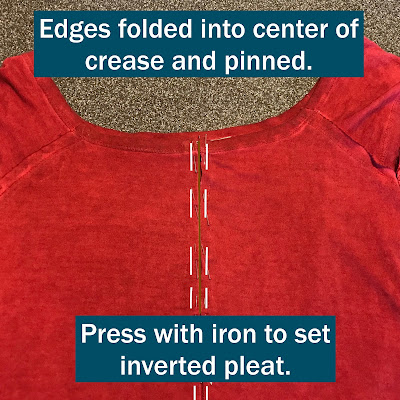
Take the outside edges of your pleat measurement and fold into the center of your crease and pin. Do this from the top to bottom of your shirt. Iron after pinning to create these two new creases in the center of your top. You have made your inverted pleat!
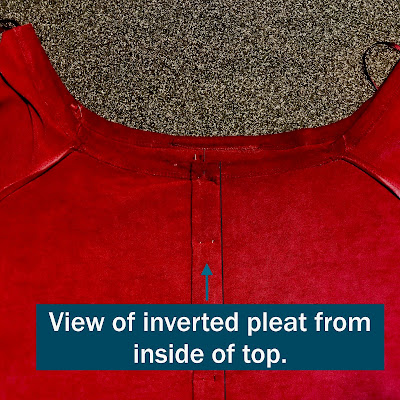 |
Inverted Pleat View From Inside of Top |
Turn your top inside out and view the back of your newly created inverted pleat. Press with iron on this side too.
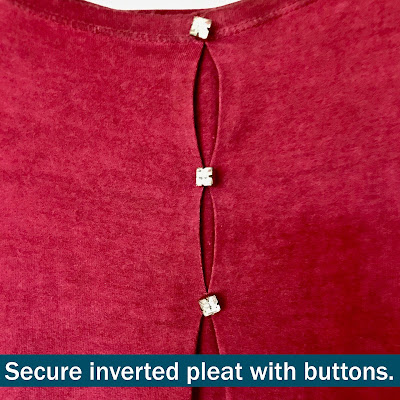 |
Secure Pleat with Buttons |
 |
Reducing Side Flare |
To create less flare on the sides of this top simply bring together the two sideseams that create an upside down V and pin together on the inside of the shirt. Pin together from underarm hole to about 2/3 of the way down the side of the shirt.
 |
Outside View of Sideseams Pinned Together |
 |
Inside View of Sideseams Pinned Together |
Here you can see the sideseams pinned together on the inside of the shirt. Sew sideseams together starting at the top of the seam to about 2/3 of the way down, leaving the bottom section unsewn.
 |
Sideseams Completed |
The sideseams are now complete. These sideseams are another version of the inverted pleat which allows me to bring the extra flare in at the top while allowing the bottom portion to still flare out.
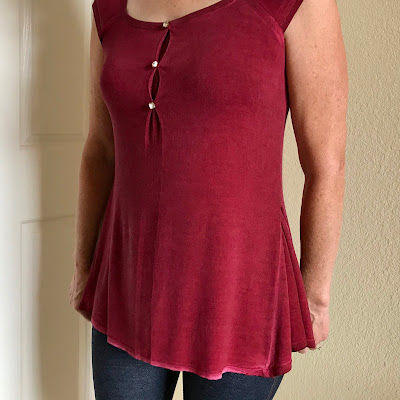 |
Completed Refashioned Top |
Here is the completed refashioned Top. It's a little more form fitted with flare at the bottom. Now I'm able to wear this top without feeling it is way too big. It's also fun to finally finish this refashioned top. Completion is a fun part of the journey! Do you have any projects that an inverted pleat might be useful to enhance with? I would love to hear of your refashion projects and techniques that you love to use.
Enjoy, Linda



No comments:
Post a Comment